DHCP Server Setup
Last Updated: May 30th, 2014
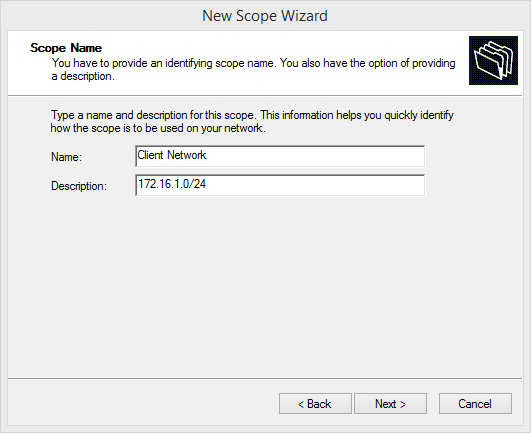
Setting up a new Scope
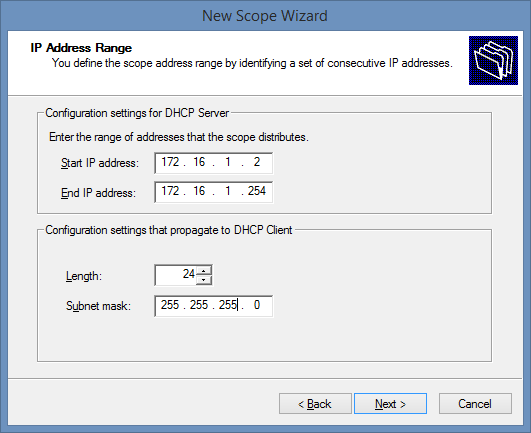
We will be creating this server on the 172.16.1.0/24 network.
Open up DHCP in Administrative Tools.
Right click IPv4 and click New Scope.
Add exclusions on the next page.
I used 8 days as the lease time. This is typically what you would use unless you have a special requirement. If you are using this DHCP Server to give out IPs to VDI virtual machines it is good to set the lease time to something like 1-2 hours.
Answer yes when it asks you if you want to configure DHCP options.
Add the default gateway address. (Typically 172.16.1.1).
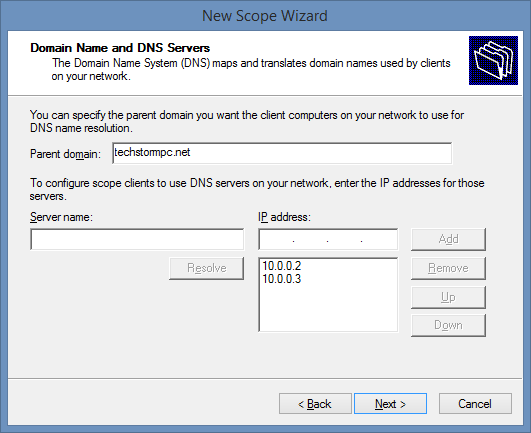
Add your DNS Servers. If you have AD setup this will auto populate. If you don't using another server like Google's DNS (8.8.8.8) is fine.
Next window is WINS server, I don't really think this is necessary.
Select yes to activate this scope.
DHCP Options
TFTP
If you want to add a TFTP server option in Windows DHCP there are some steps that you have to take.
Right click IPv4 and click Set Predefined Options.
Click Add.
Populate the fields with this

Now under Server Options, click Configure Options and scroll down to item 150.
Check the box and type in your TFTP Server's IP Address.
WDS
If your WDS Server is on a different host, you must configure this manually.
Go to Configure Options and set items 066 and 067.
Make it look like this:
![]()
The bootfile name is "boot\x64\wdsnbp.com"
Backup and Restore
netsh dhcp server export C:\dhcp.txt all
netsh dhcp server import C:\dhcp.txt all